How To Backup Your Files Using Windows 10 File History
A hard drive failure is what most people imagine when they think of a nightmare data loss scenario. However, a hard drive failure is just one way to lose your data. You could just as easily experience a catastrophic data loss from malware, viruses, theft, liquid damage, or physical damage to the hard drive itself. You know, like someone going crazy and smashing it with a hammer. Hey, it happens.
So, what would you do if you lost all the data stored on your computer? Could you be back up and running in a matter of minutes or hours? If not, how much would the downtime cost you?
If you’ve never backed up your files or even thought about backing up your files you can fix that right now by turning on Windows 10 File History (It’s turned off by default). It will backup your main folders as frequently as you want, anywhere from every 10 minutes to once per day.
What you’ll need: An external hard drive
That’s it. You just need somewhere to store your backed up files. I’ll let you decide if you want an external hard drive that plugs into your computer’s USB port or a wireless hard drive.
How to use Windows 10 File History to back up your files
- Attach your hard drive to your computer’s USB port. (If you’re using a wireless hard drive, turn it on.)
- Go to Start > Settings > Update & Security> Backup
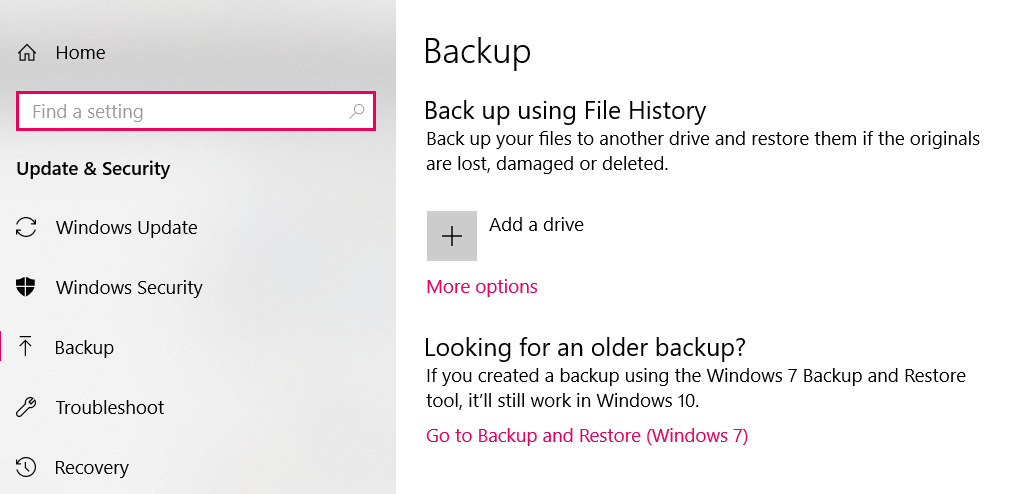
Click Add a drive and then select your drive. (If your external hard drive isn’t listed that means that Windows isn’t recognizing it. Try unplugging it and plugging it back in again. If that doesn’t work, unplug it, restart your computer, and then plug it back in again.)
After you add a drive you’ll see that the Add a drive option changes to an on/off toggle switch.
After you toggle on File History click More options and then Back up now. Windows 10 will now start creating a backup. After it creates the initial backup it will backup the changed files according to your chosen frequency.
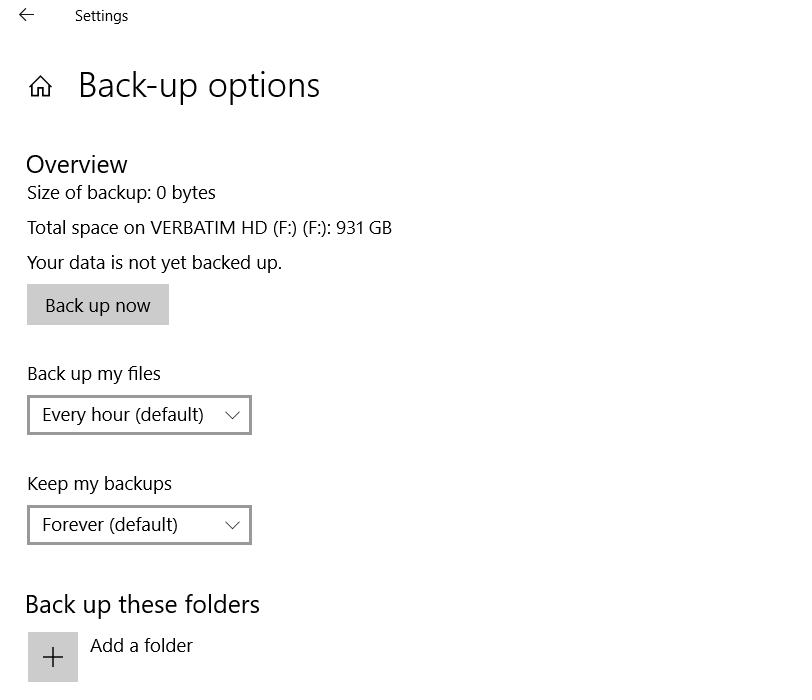
In addition to being able to choose how frequently you back up your files you can also choose how long you want to have them around. Note that you can also add specific folders to the automatic backup as well.
Your backup files are contained in a folder called FileHistory. Whatever you do, don’t delete or move that folder! If you do Windows won’t be able to restore it later.
One File History backup per user account
Windows 10 File History will not back up the files of other user accounts. If someone with another user account wants to back up their files they’ll need to turn on File History under that user account.
File History vs System Image
File History only backs up your main folders. If you want something more comprehensive System Image, first introduced in Windows 7, is for you. A Windows 10 System Image backs up everything, including your desktop programs. It takes the content of your hard drive and puts it into one file which it then stores on another hard drive. If your hard drive fails all you need to do is replace it with a new one and then restore your system image backup.
Ideally, you should be creating a System Image on a daily basis, if possible. Then, if your hard drive fails you, or someone else, like a technician, can use the System Image to retrieve your programs and files. Feel free to store your Windows 10 System Image on the same drive with your File History folder provided there’s room enough to store the contents of your C: drive.
How to create a System Image in Windows 10
To create a System Image in Windows 10 go to…
Start > Scroll down to Windows System > Control Panel > System & Security > Back up and Restore (Windows 7) > Create a system image
…and follow the steps.
When you’re done find out How To Restore A Windows 10 File History Backup