Working With The Windows 10 Start Menu And Timeline
Windows 10 Timeline
The Windows 10 timeline gives you a bird’s eye view of all your open programs and apps. You get to it by clicking the Task View icon in the taskbar:

You can now see all your open programs and apps. You can close them individually by clicking the red X in the upper right corner of each miniaturized window. (You can also right-click on a window and choose Close.) To close the Timeline itself just click on the desktop.
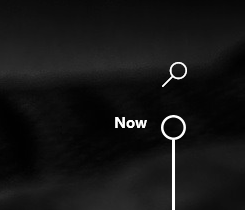
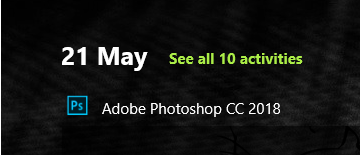
With Timeline open notice that there’s a scroll bar on the right side of your screen. At the top of the scroll bar it says “Now” (i.e. today’s date) and at the bottom it shows the date 3 days prior. Scroll down and you’ll see all the programs and apps that you’ve used over the previous 3 days. If you click on one of the windows in the Timeline it will open in a new tab.
Use the search tool to find websites or files that you previously had open.
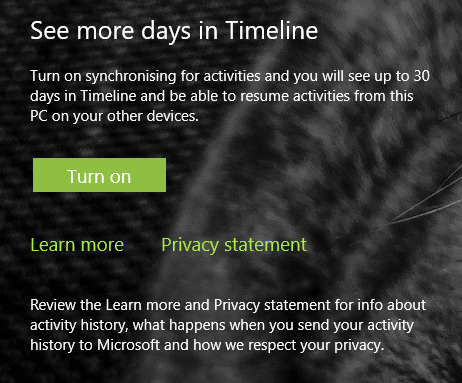
The default Timeline setting allows you to see your activity for the past three days. If you want to see your activity for the past 30 days you’ll need to turn on synchronizing. Go to Timeline, scroll down to the bottom of the page, and click Turn on. You can now see your activity going back 30 days.
Notice that it shows you a maximum of six activities on any given day. If you want to see everything you’ve opened on a certain day click See All Activities located next to the date. (Days that have six or fewer activities will not show the See All Activities link.)
If don’t want Microsoft to see 30 days worth of your work history you can turn off the data collection by going to Settings > Privacy > Activity History and then unchecking the boxes under Activity History. If you go back to the Timeline now you’ll see only three days worth of your activity history.
Customizing the Windows 10 Start menu
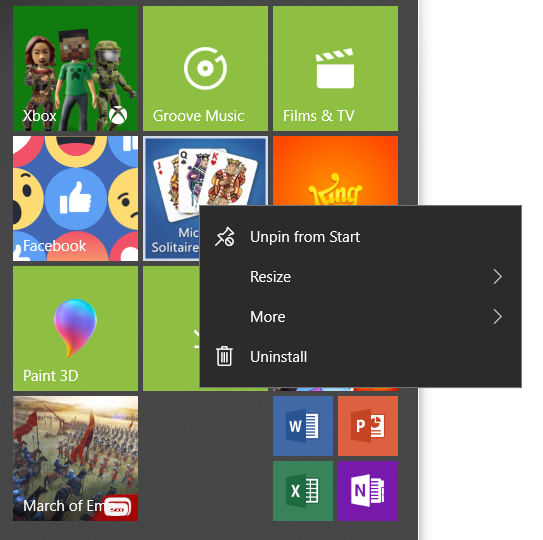
1. First of all, let’s get rid of all those items on your Start menu that you probably don’t want, like the Microsoft solitaire collection.
To remove a Start menu item right click on it and choose Unpin from Start. Do this on each unwanted menu item. Don’t worry. You’re not uninstalling anything. You’re just removing it from the Start menu. You can add it back to the Start menu anytime you want by following step 2 below.
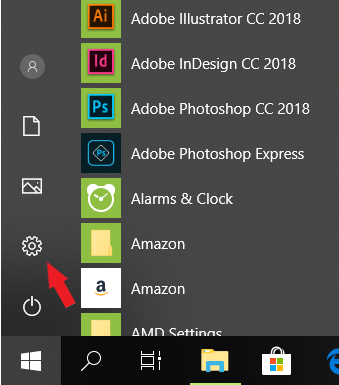
2. Now let’s add some items you want to the Start menu. To add items to the Start menu click the Start button to see an alphabetical list of all your installed apps.
Right-click on the apps that you want to add to the Start menu and select Pin to Start.
You can add pretty much whatever you want to the Start menu. Go to your desktop and right click on folders, files, or anything else you want to add and select Pin to Start. Newly pinned items go to the bottom right corner of the Start menu.
If you can’t find an app that you want to pin to the Start menu you can use Search to find it.
![]()
3. Now let’s move your tiles around. Maybe you want related tiles next to each other.
To move a tile hold down the left mouse button and drag the tile to the desired location. Notice how the other tiles move out of the way to make room for the new tile? Release the mouse button to drop the tile in place.
You can also resize the tiles. Right-click on a tile, select Resize and then choose a size.
4. Organize your tiles into groups.
Create a new group by clicking on a tile and then dragging it away from the group it’s already in. See how I’m dragging the Facebook tile away from the others? When you do this a horizontal bar will appear.
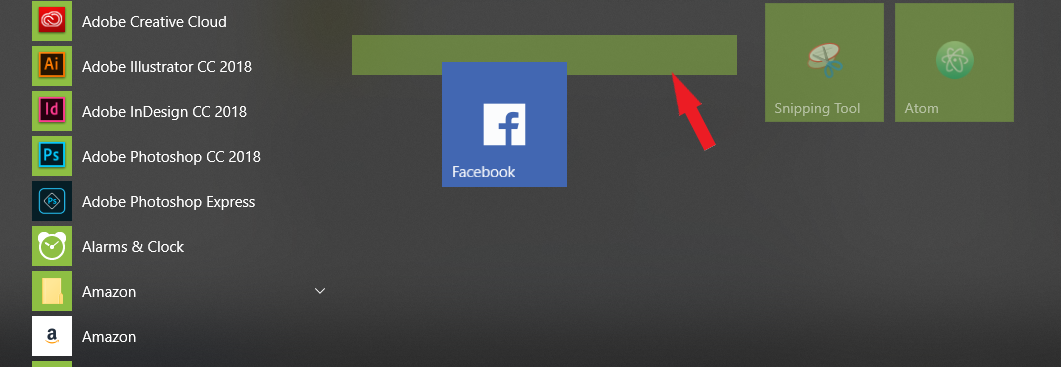
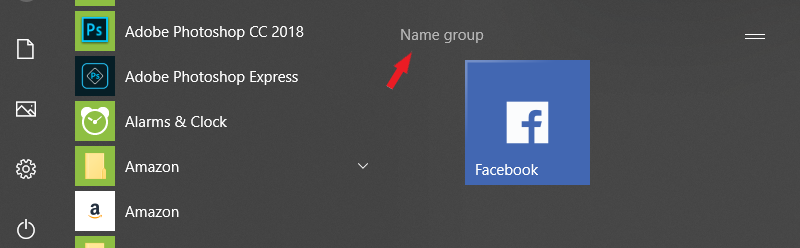
As soon as you see the horizontal bar release the mouse to drop the tile. Now I have a new group containing one item, Facebook. Hover over the area above the tile and you’ll see Name Group appear. Click on that to give your new group a name.
You can now drag and drop other tiles into this new group and even rearrange the tiles within the group by dragging and dropping. You can create any number of groups this way.
You can drag entire groups around the Start menu as well. Go ahead and try it. Click on the name of a group and start to drag it.
Keep in mind that newly installed apps or programs will not appear in the Start menu unless you add them using the steps outlined above.
Pinning a website to the Windows 10 Start menu from Edge
From Edge browser click the More icon (three dots) and select Pin this page to Start.
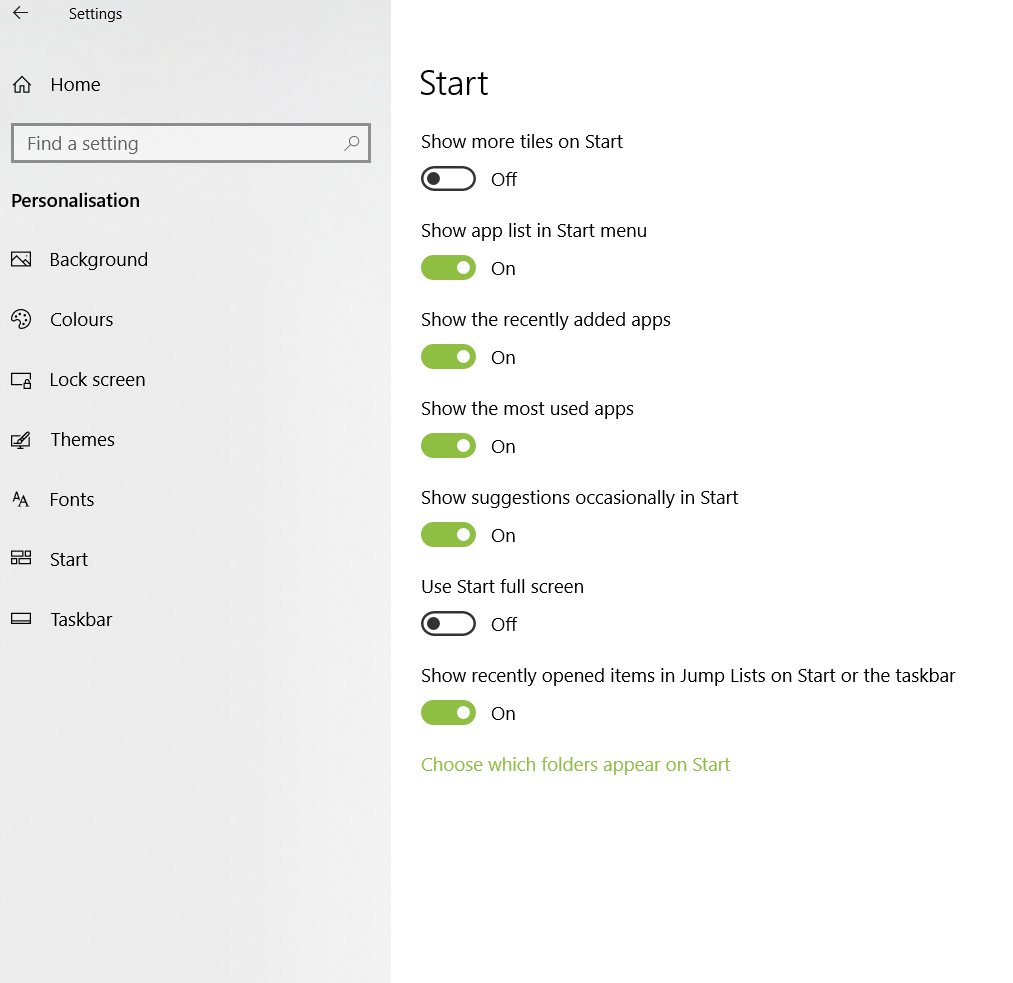
Personalizing the Windows 10 Start menu
To make various adjustments to the Start menu go to Start > Settings > Personalization > Start