How To Use Windows 10 System Restore
You installed a new program, modified the registry, or made some other other change and now you’re noticing a few problems. Something went wrong, somewhere. No need to panic. The Windows 10 System Restore feature is going to undo those changes and get you back up and running again in no time flat. You’re not going to believe how simple this is to use.
Windows 10 System Restore is disabled by default. That means that you need to turn it on if you’re going to use it. After you turn it on it will automatically generate system restore points whenever it detects a significant change to the system. However, you also have the option to manually create the system restore points. I’m going to teach you how to turn on Windows 10 System Restore, how to manually create a system restore point, and how to undo changes using Windows 10 System Restore.
How to enable Windows 10 System Restore
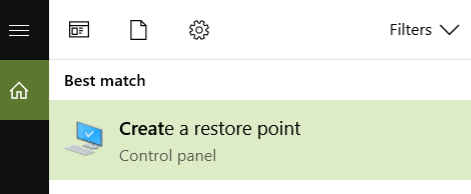
Click the search icon in the taskbar and search for “create a restore point”.
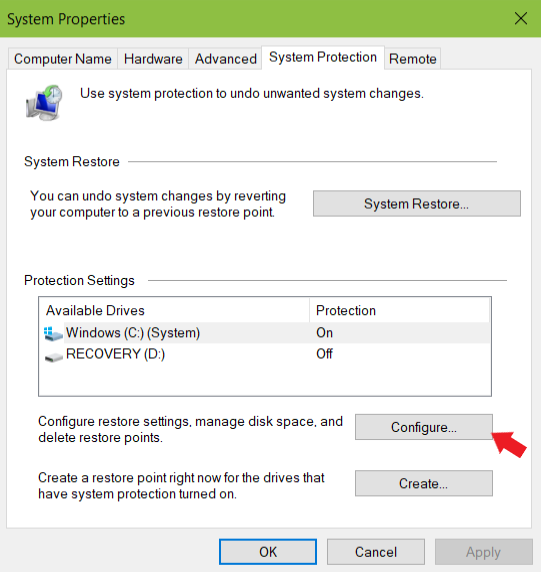
In the System Properties window, select the System Protection tab and click Configure.
Select Turn on system protection. Note that you can use the slider to adjust the maximum disk space used for system protection.
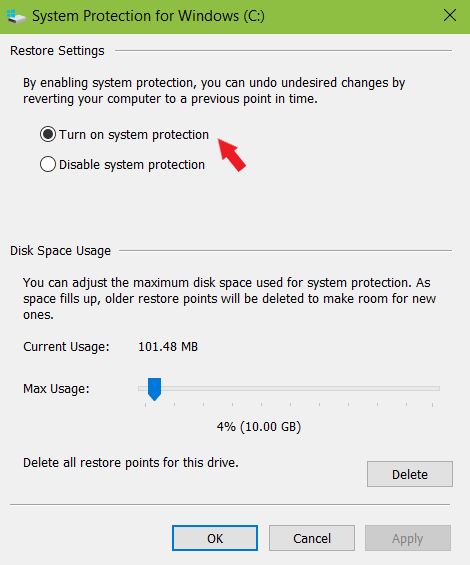
Click Apply and then OK.
From now on, whenever a significant system change happens a new restore point will be created automatically. This system change could be installing a new application, installing an update for Windows 10, or modifying the registry.
How to manually create a Windows 10 system restore point
If System Restore is enabled, Windows 10 will automatically create restore points. However, there may be times when you’ll want to manually create a restore point. For example, you’ll probably want to create a restore point first if you’re going to make a change that might cause huge problems if it isn’t done correctly,
Click the search icon in the taskbar and search for “create a restore point”.
In the System Properties window, select the System Protection tab and then click Create.

Enter a description for your new restore point. Don’t make it too cryptic or you may have trouble remembering why you created it.
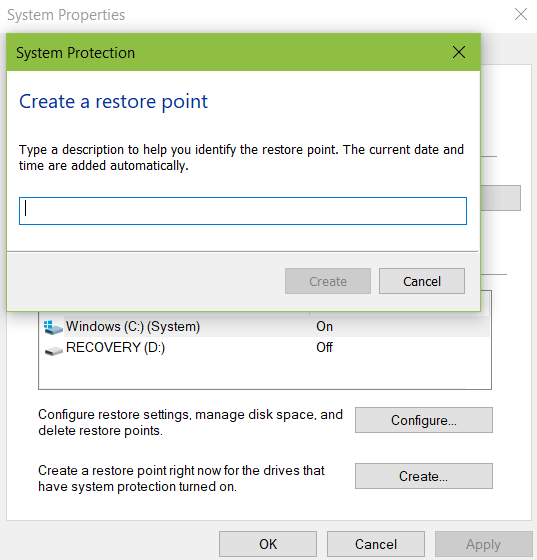
Click Create.
Now, if something goes awry after installing a new application or modifying the registry you can easily undo the changes using System Restore. Let’s see how to do that.
How to undo changes using Windows 10 System Restore
So, let’s now assume that something did go awry after installing that new app and you need to undo the changes using the restore point you just created.
Click the search icon in the taskbar and search for “create a restore point”.
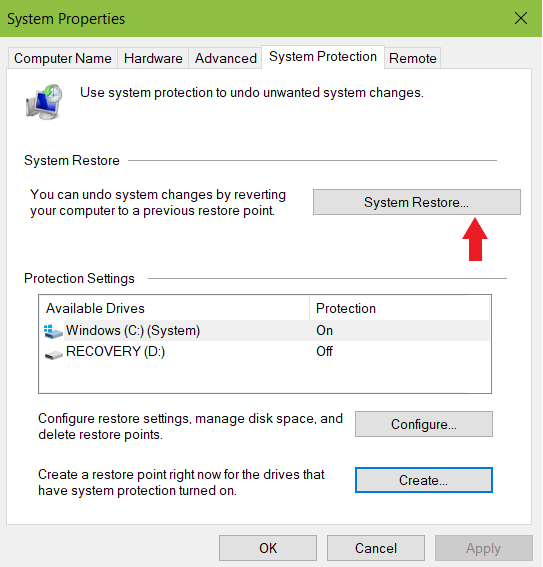
In the System Properties window, select the System Protection tab and then click System Restore.
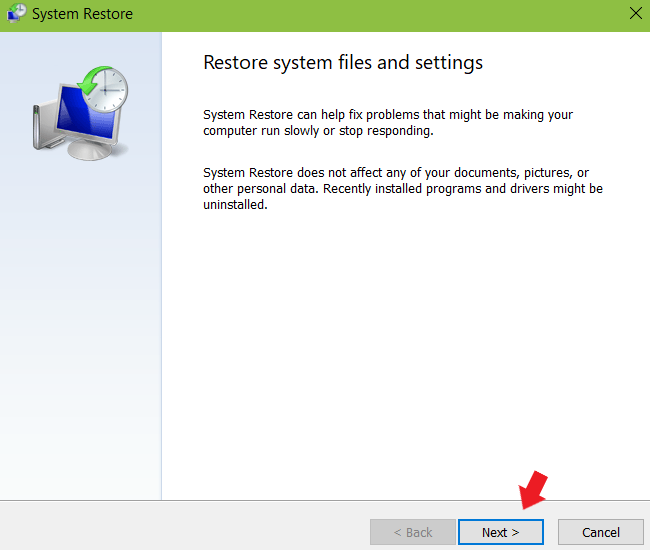
Click Next.
You’ll see a list of restore points. Select the most recent restore point that you know will fix your current problem.
Click Scan for affected programs to see which programs will be removed by restoring your computer. Obviously, anything that was installed after you created the restore point will be removed. That’s the whole point of System Restore.
Click Close, Next, and then Finish.
You’ve now set your device back to the point where everything was working fine.
Note that you can also delete any checkpoints in order to free up space.